New to the app? You'll be ready to shop in under two minutes.
📱 Screenshots show the Android app — iPhone screenshots are coming soon.
No account. No sign-up. Free. Open the app and you're ready to go — everything is stored on your phone and works offline. The first time you open it, a short 3-screen intro shows you around (you can even try the voice button on screen two). This guide covers the same ground at reading pace.
Everything lives behind the four tabs along the bottom of the screen:
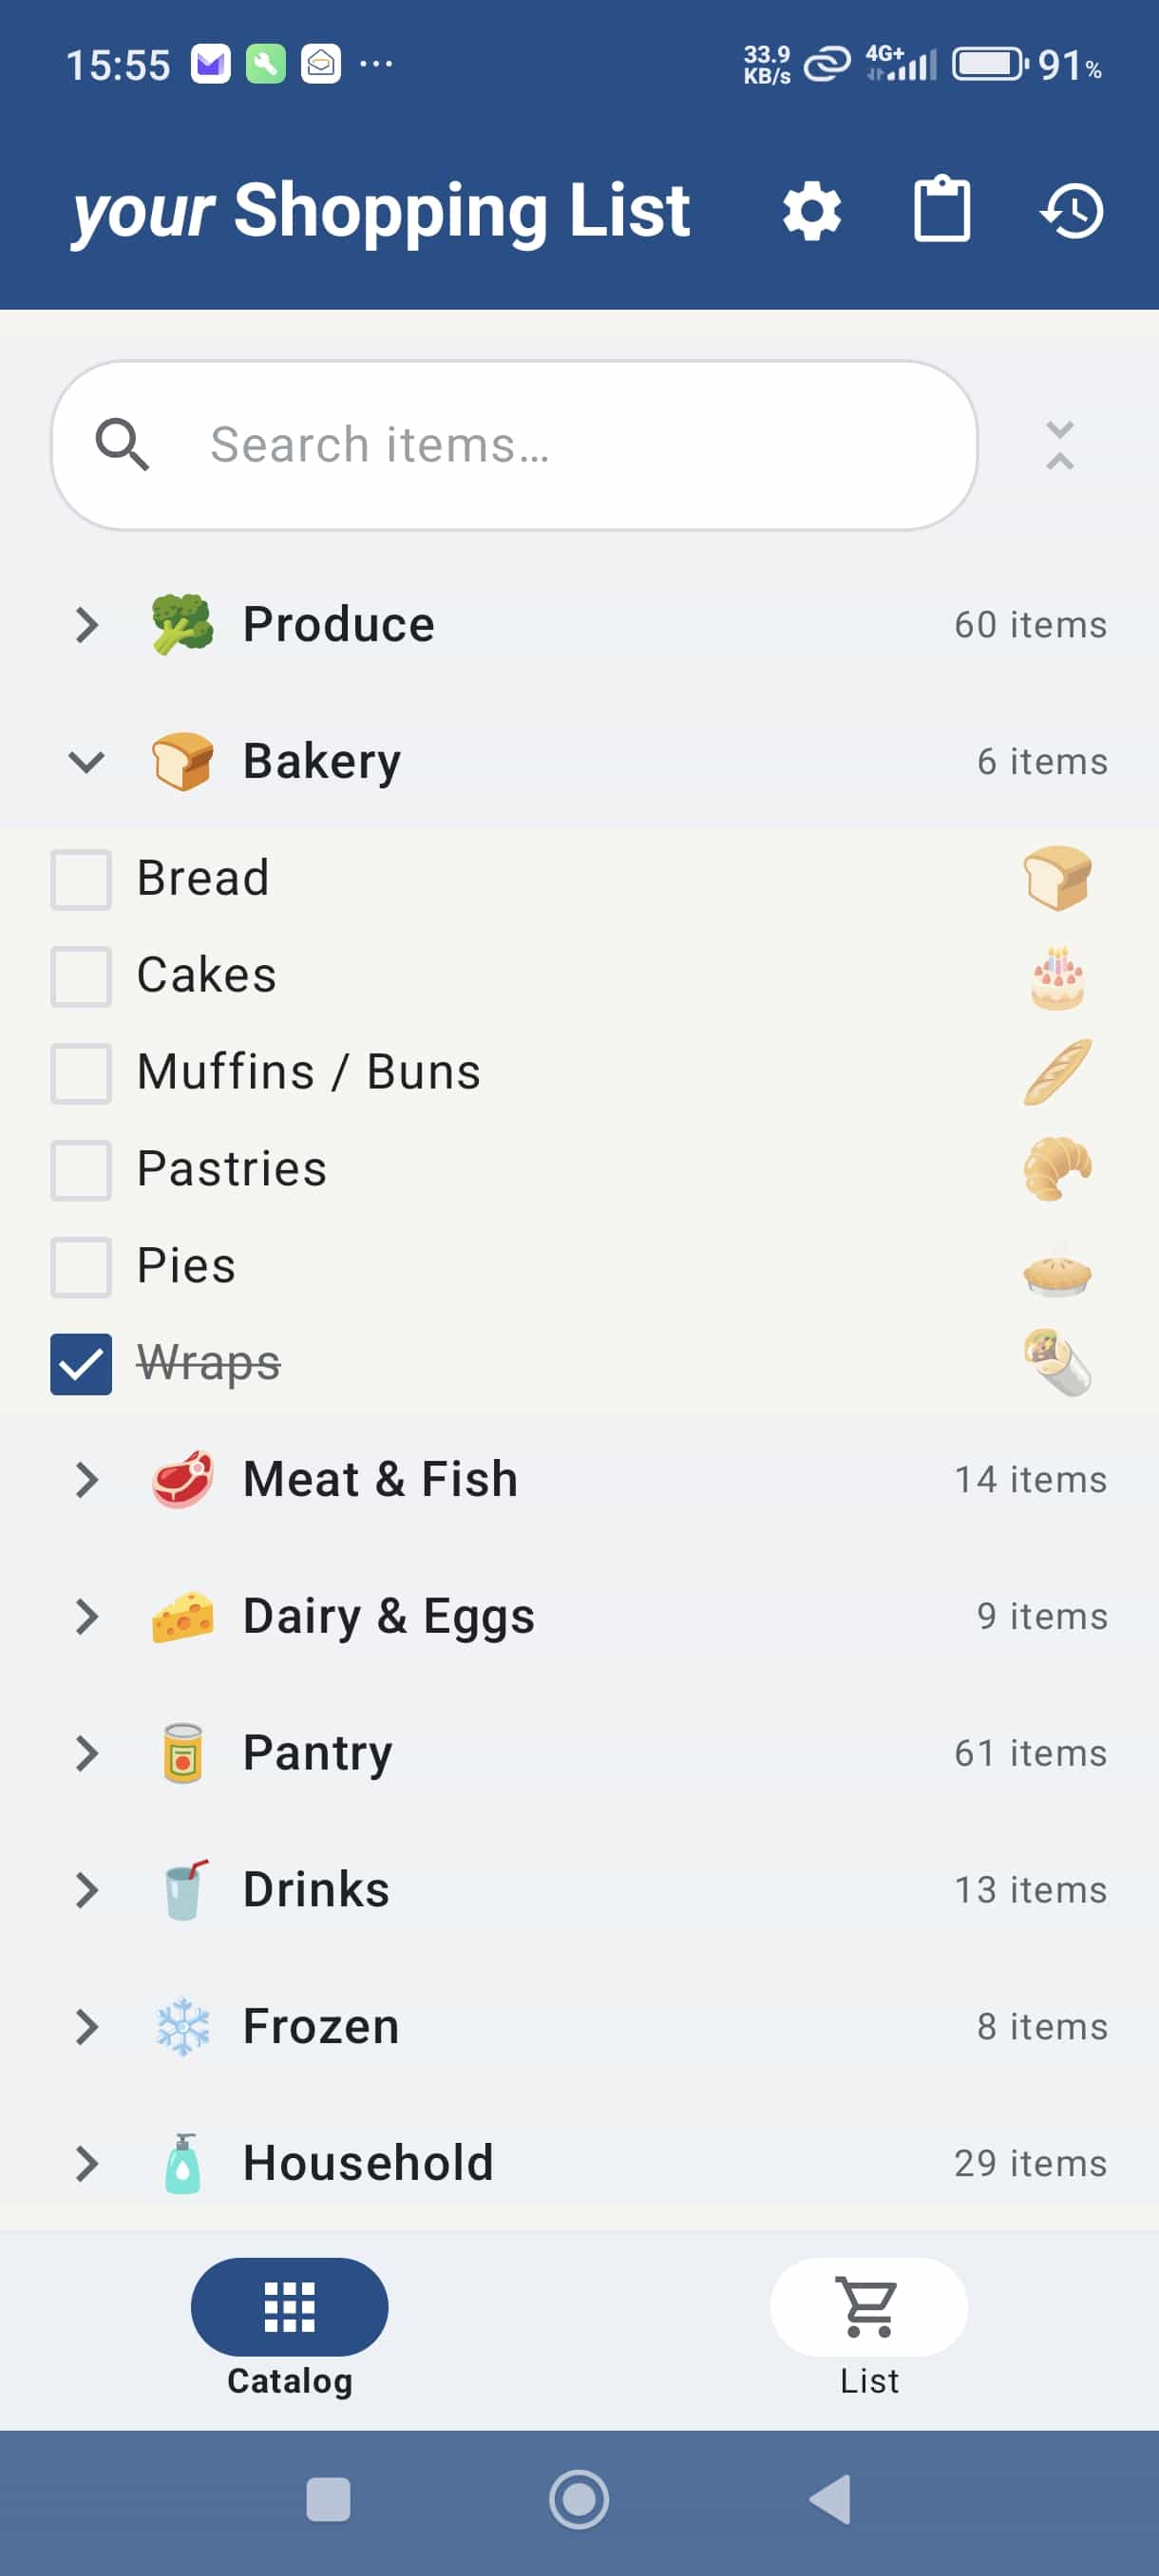
Open the Catalog tab and tap any item — it instantly jumps onto your list. Browse the categories, or just start typing in the search bar: two or three letters is usually enough.
Can't find something? Keep typing and a + Create new item option appears — give it a name, an emoji, and a category. See Catalog & Items.
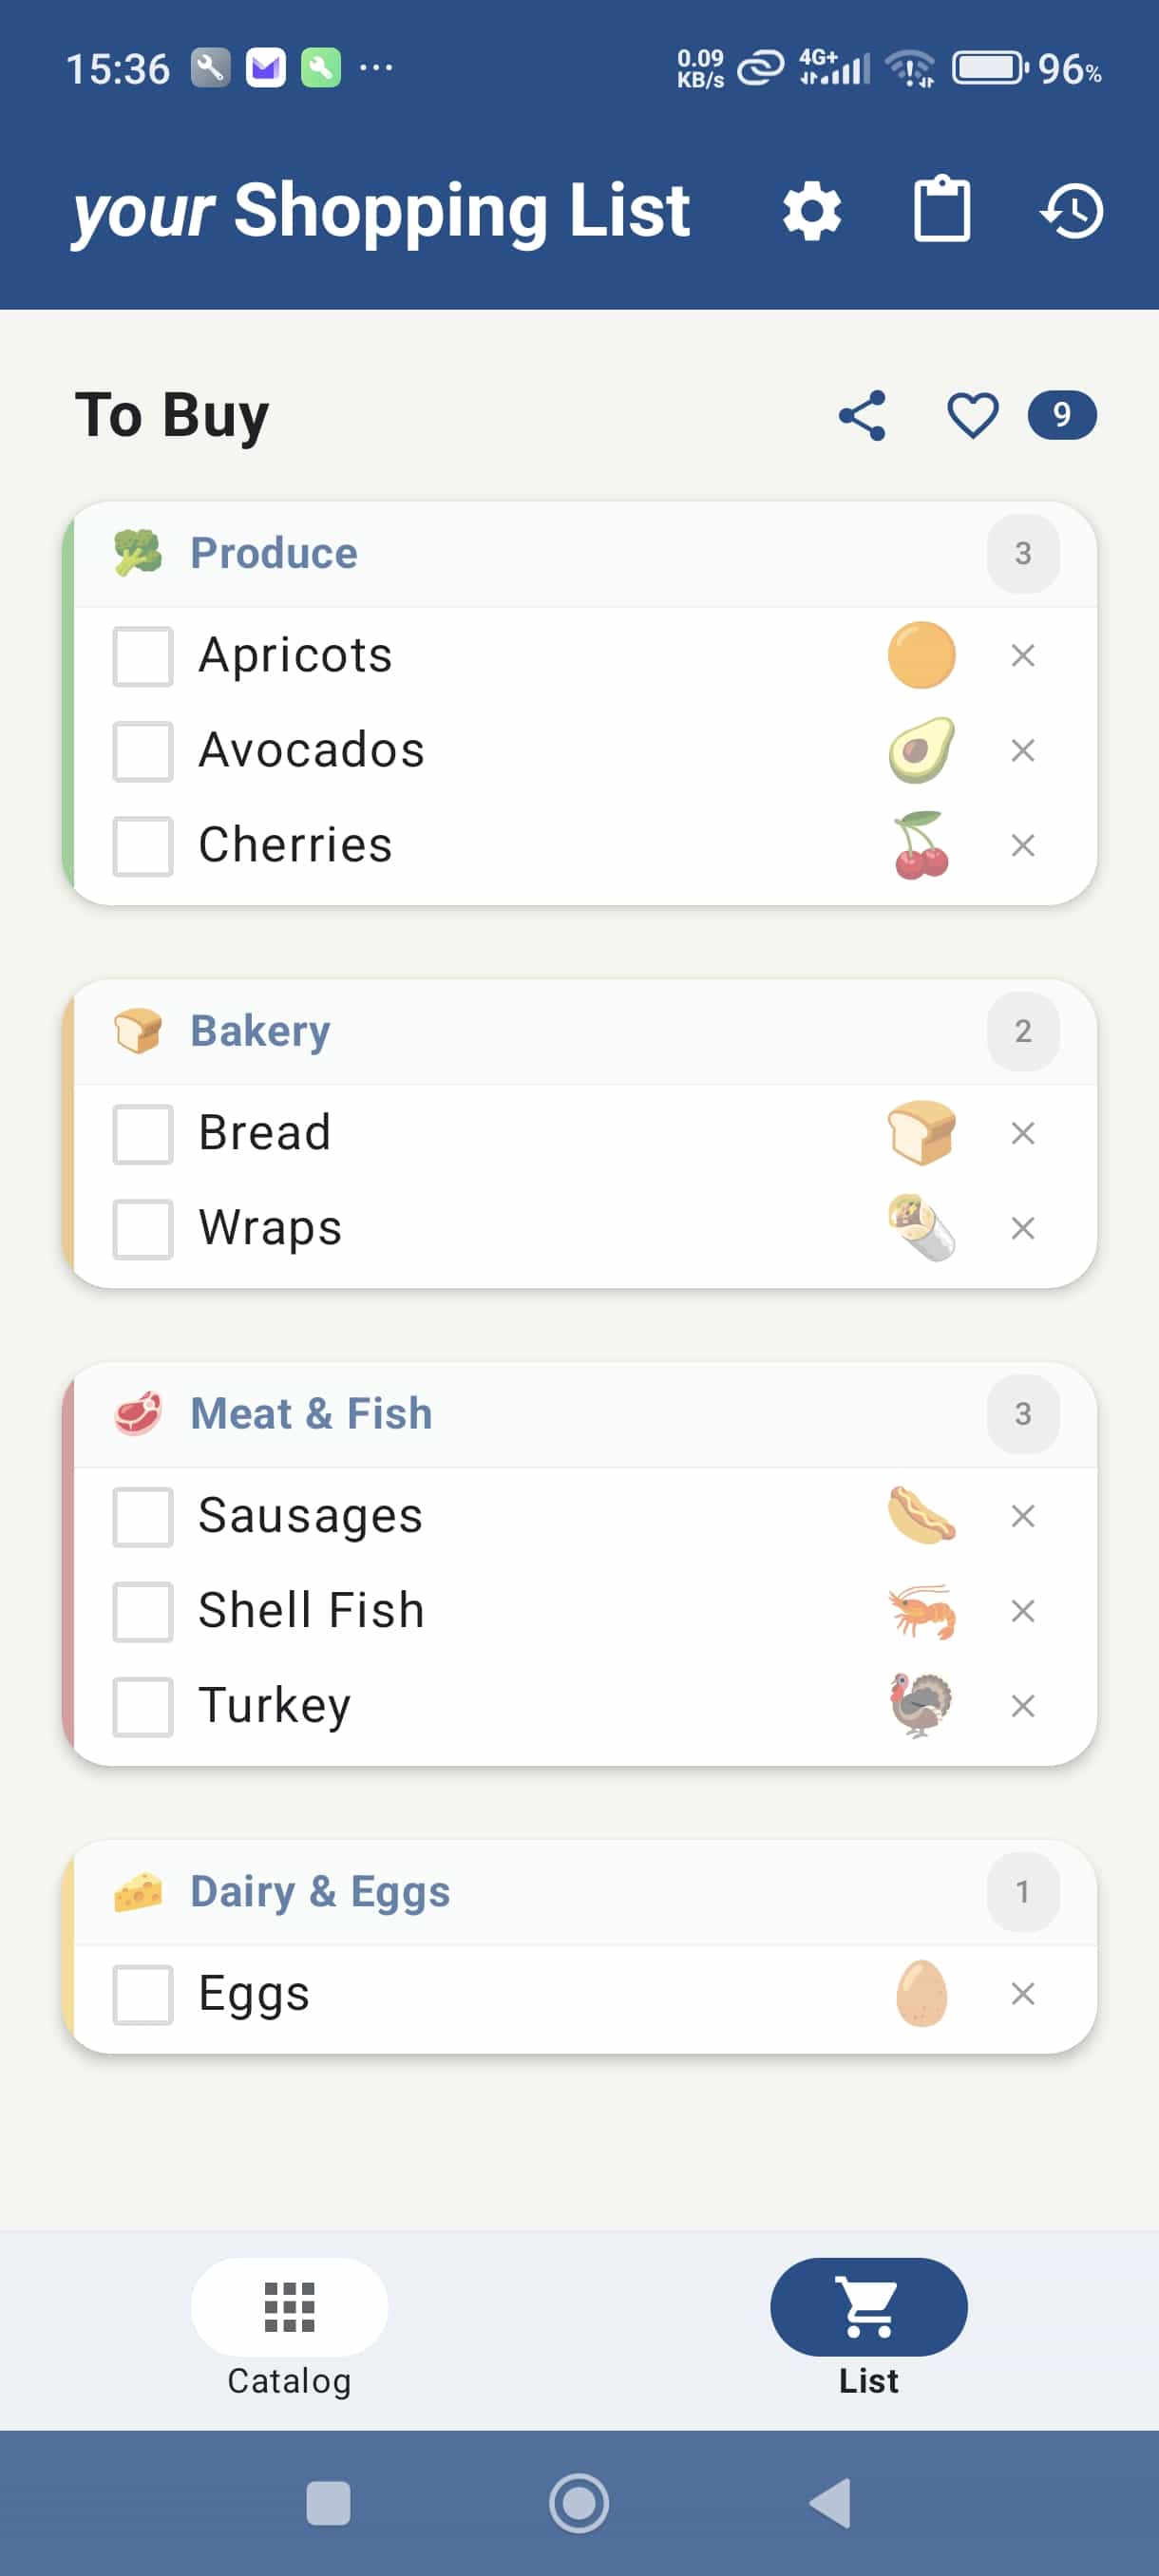
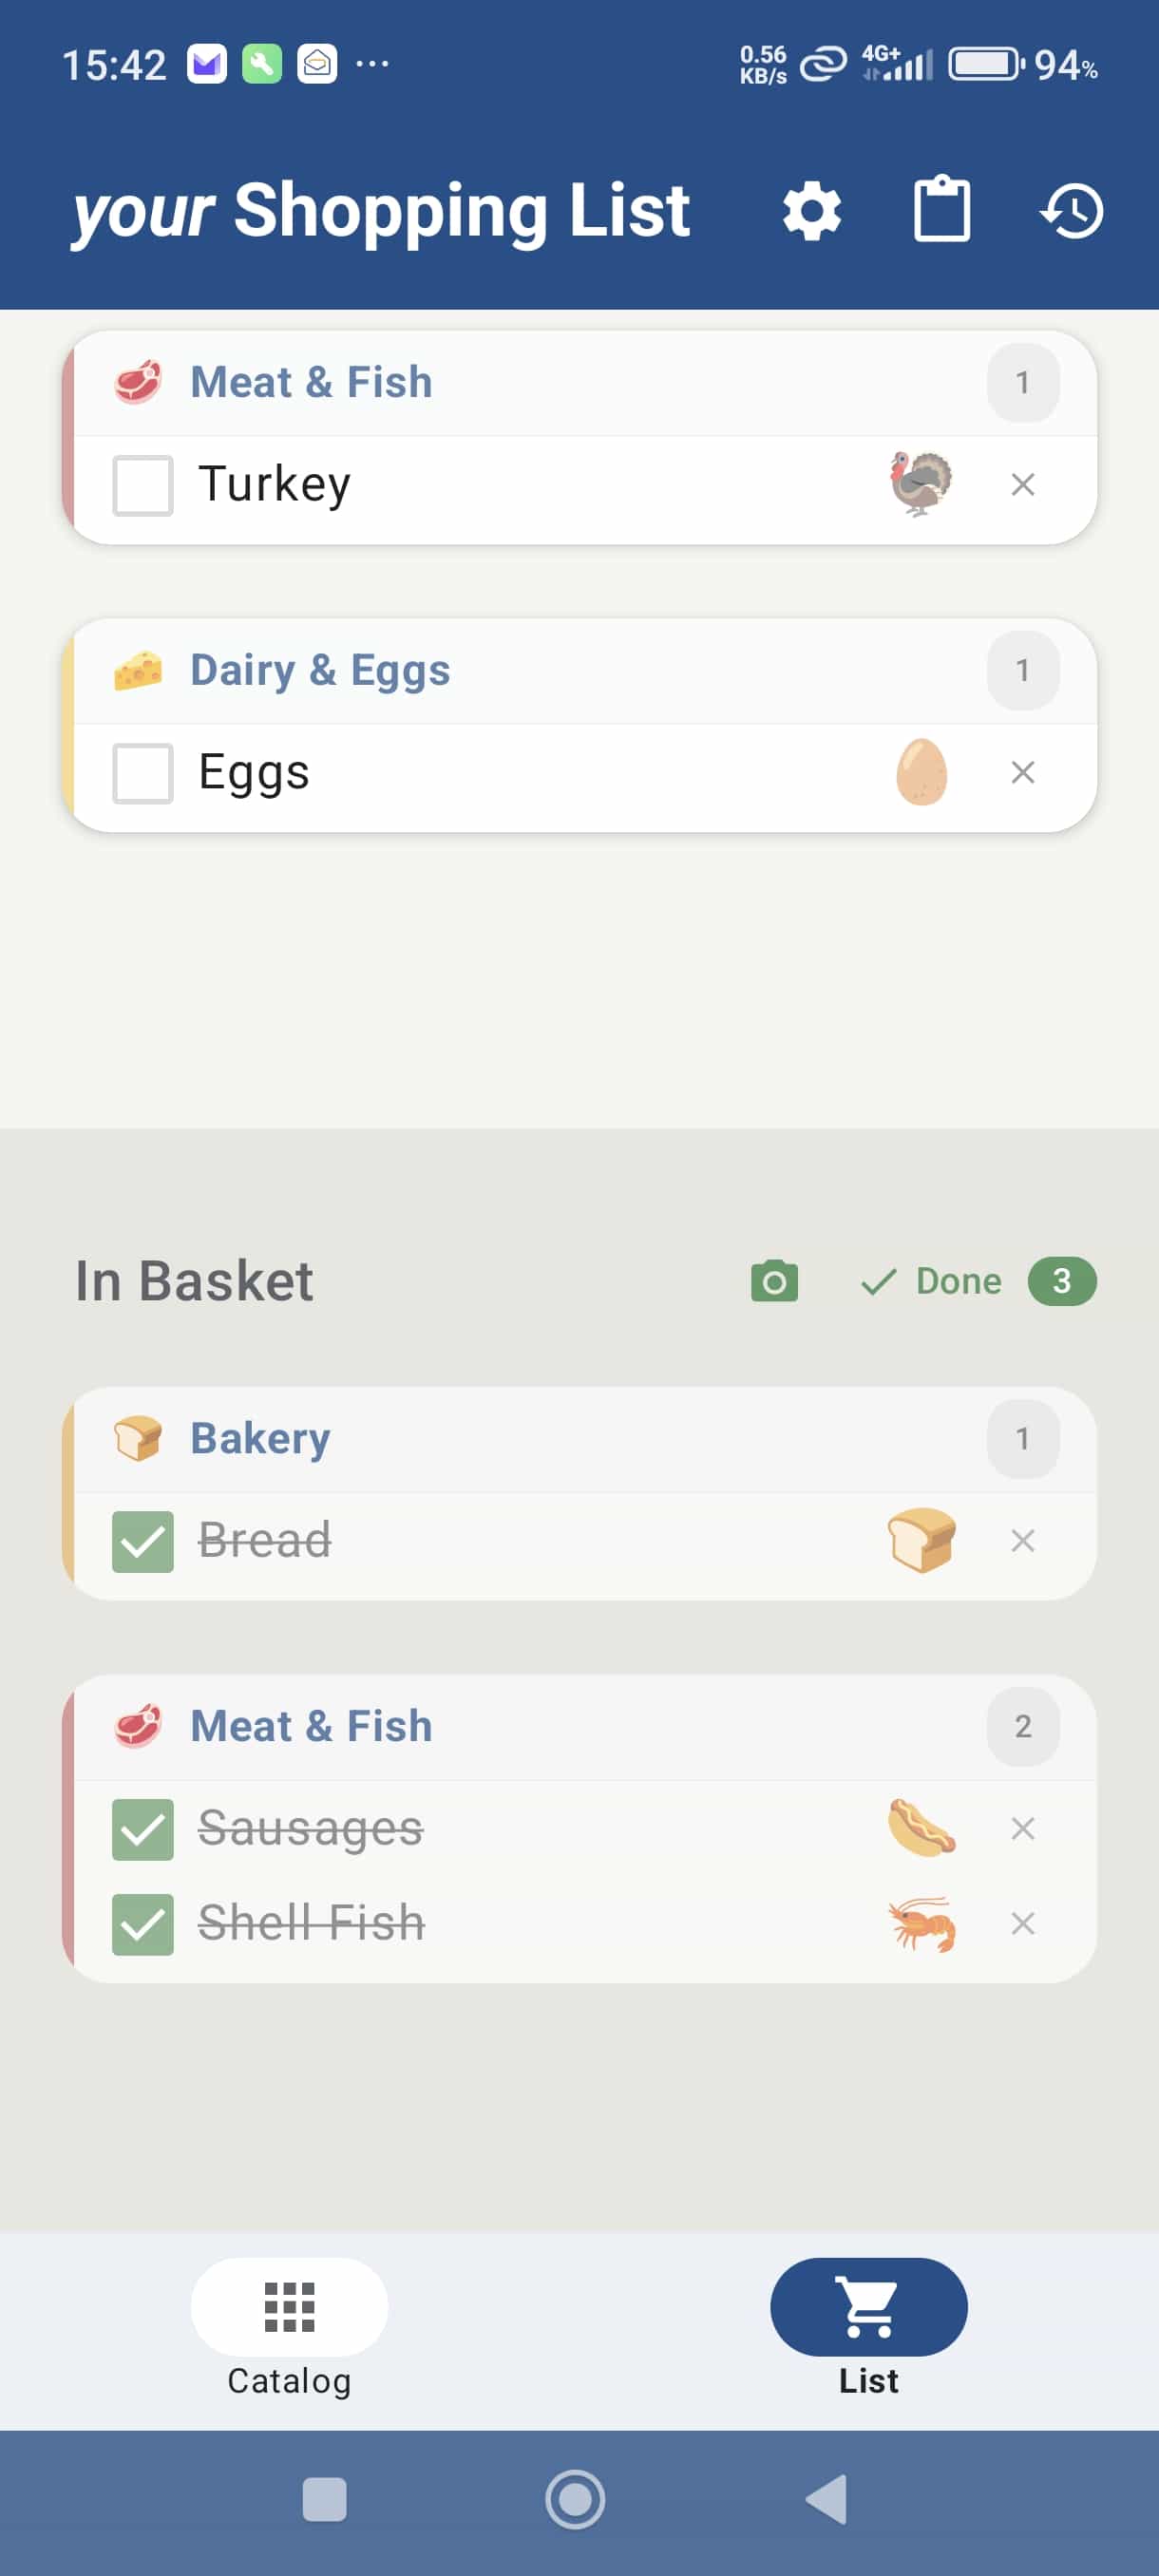
On the List tab, tap an item as you put it in your trolley. It moves from To Buy down into In Basket. Changed your mind? Tap it again in In Basket and it moves back up.
Items are grouped by category, so you can work through the shop aisle by aisle.
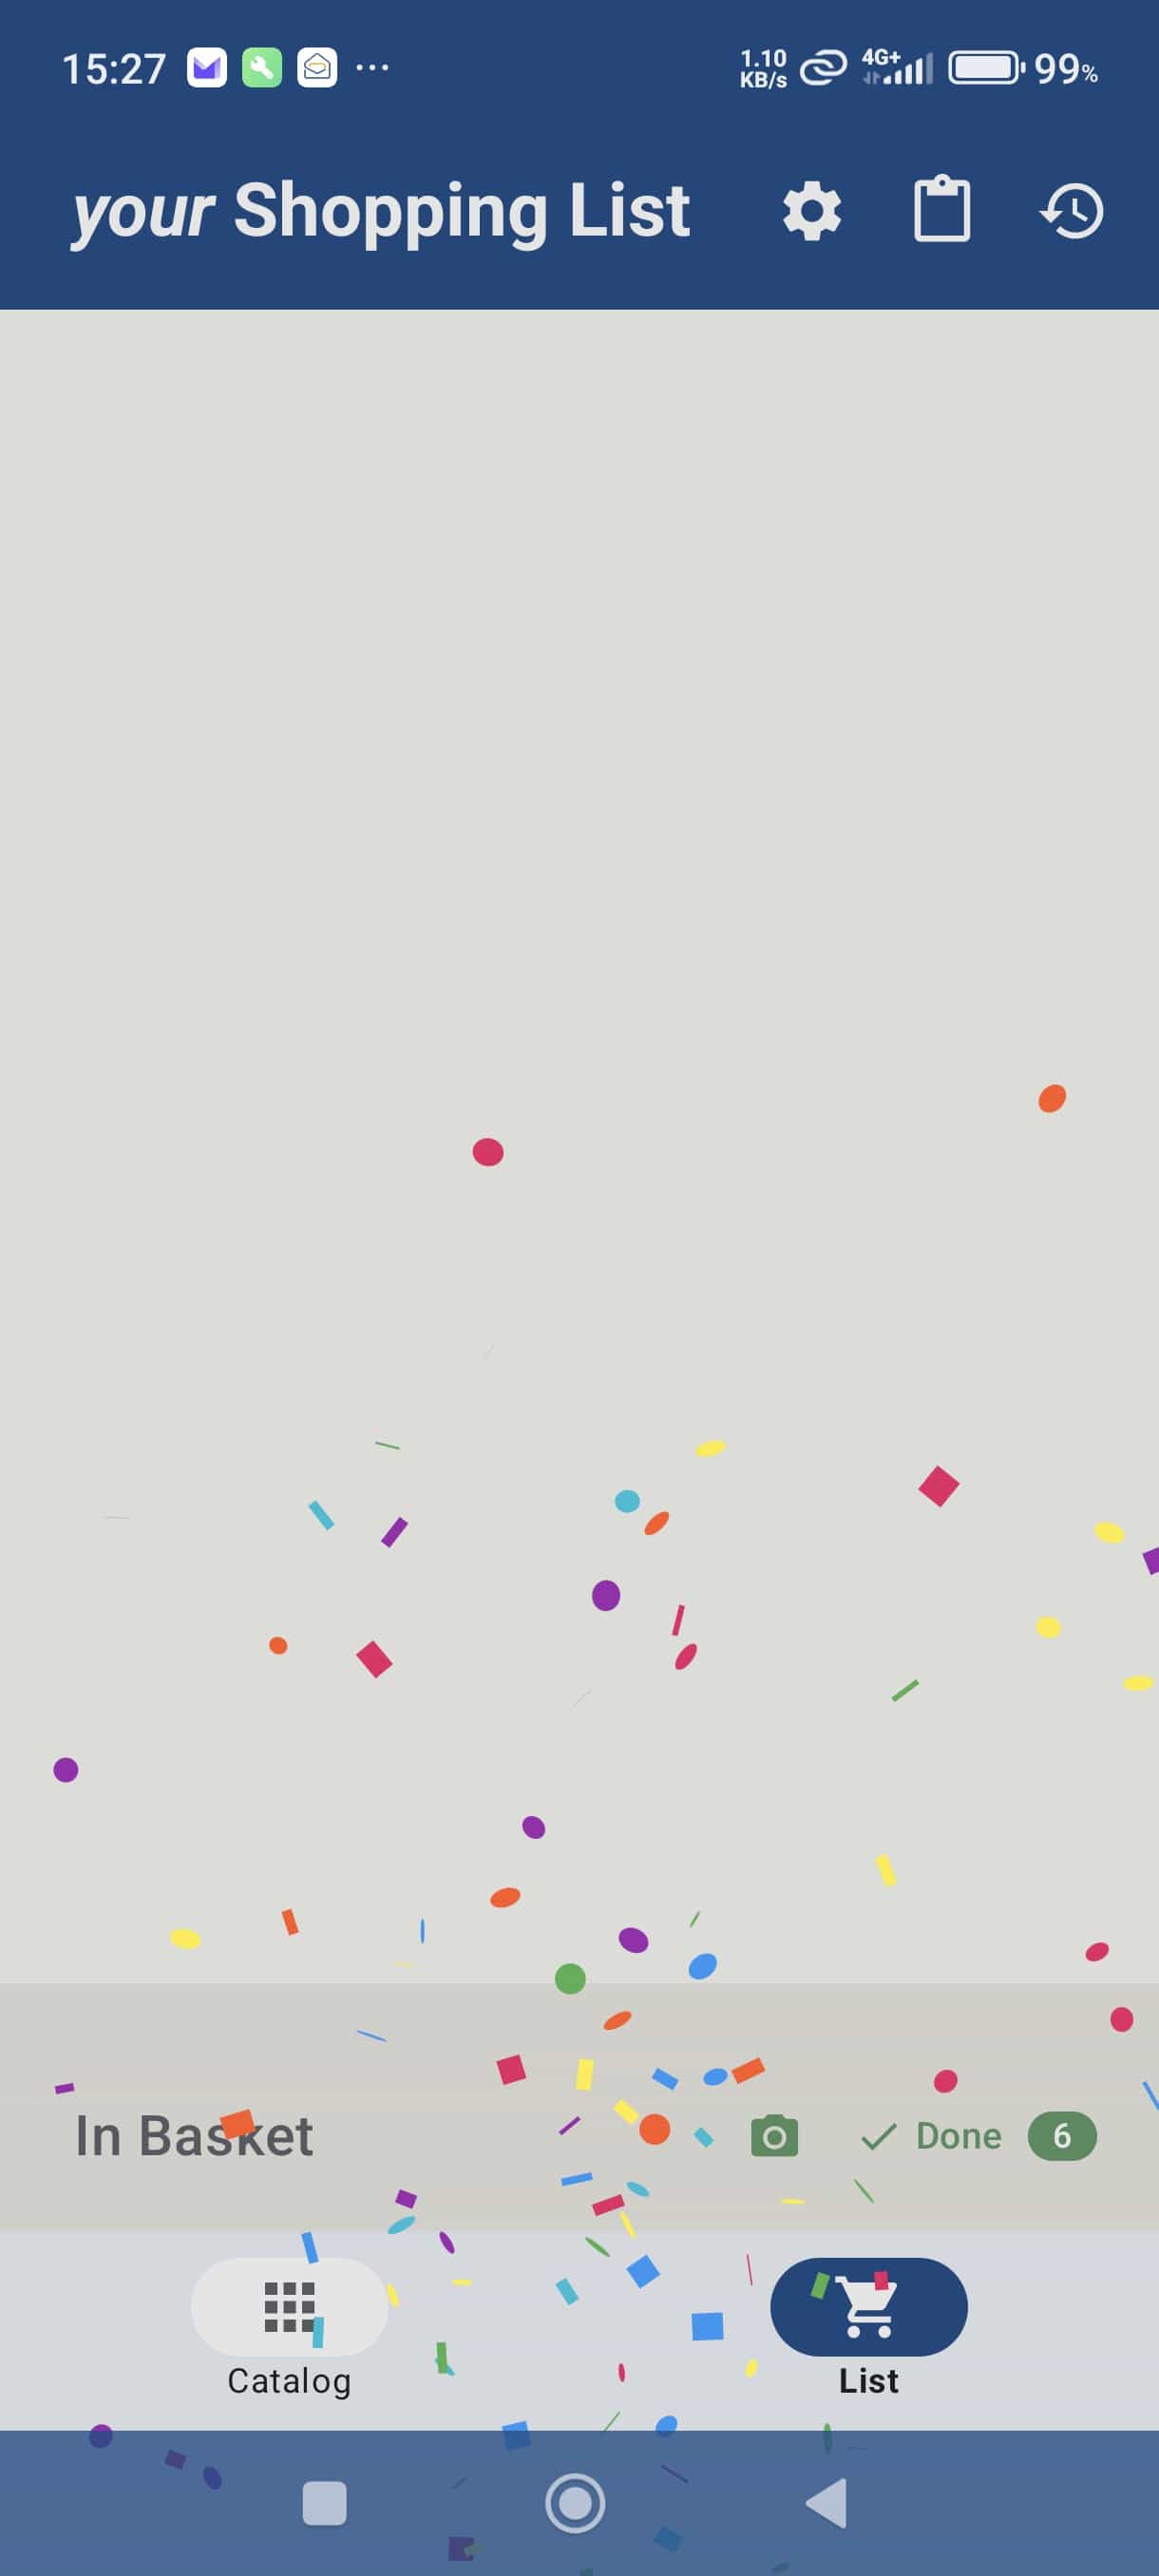
When the last item is ticked off, a celebration plays. Tap ✓ Done and the trip is saved to History — your list clears, ready for next time.
Right after Done, the app offers "Add to pantry?" — one tap logs everything you bought into your Pantry. Skip is always there if you don't use the pantry.
Tapping the catalog is just the start. Once you know the app, you'll mostly use these:
That's a complete shopping trip. Explore the other guides whenever you're ready — the app keeps working the simple way until you want more.